Easter, a time of vibrant eggs, fluffy rabbits, and jubilant celebrations, is imminent. Easter egg dying is a beloved tradition that adds vibrant colors to this holiday. Have you ever wondered what is used to color Easter eggs? This article will discuss the intriguing world of Easter egg dying, including its ingredients, history, and how to create your unique egg colors.
The Basics Of Easter Egg Dye
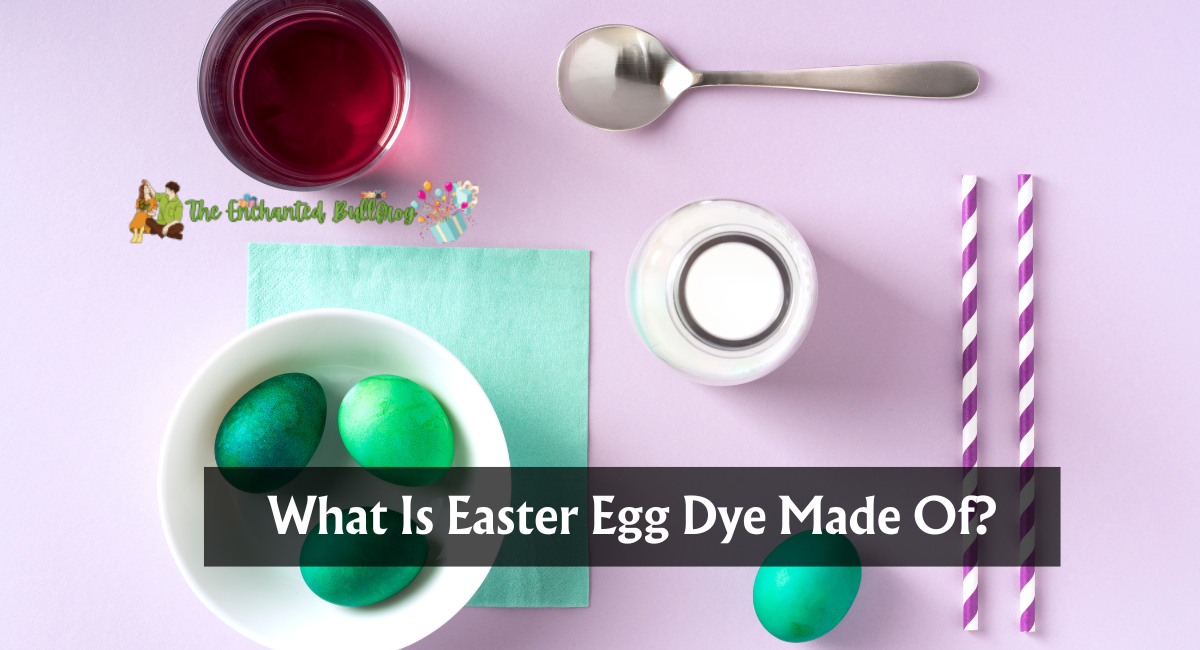
Easter egg pigment is a liquid or tablet solution for coloring Easter eggs. It is designed to provide Easter eggs with vibrant colors that are visually enticing. Food coloring, water, and Vinegar are the three primary components of commercial Easter egg dyes.
The Role Of Food Coloring
Food coloring is essential to Easter egg coloring. It is available in various forms, including liquid, gel, and granules. These colorants are edible and, when diluted, are ideal for tinting eggs. Food coloring is available in various hues, allowing you to dye Easter eggs in different shades.
The Magic Of Vinegar
Vinegar is an essential ingredient in Easter egg dye. It serves two critical functions: it helps establish the paint onto the eggshell, ensuring that the color will last, and it brightens the color by increasing the dye’s adhesion.
Ancient Origins
Easter egg dying has ancient origins, with evidence dating back to ancient civilizations such as the Persians and Egyptians. These cultures created intricate egg designs using natural substances such as plant extracts and seasonings.
Modern Easter Egg dye
Egg dyeing has become more accessible and imaginative in the modern era. With their vibrant hues and user-friendliness, commercial egg-dyeing products have made this tradition an integral part of Easter celebrations worldwide.
Creating Your Own Easter Egg Dye
Here are the step-by-step details for creating your own Easter egg dye:
Homemade Dyes Recipes
If you’re feeling adventurous, you can create your own Easter egg dye using ingredients you may already have in your kitchen. For instance, red cabbage leaves can produce stunning blue tones, whereas turmeric produces a rich golden-yellow hue.
Experimenting with Natural Dyes
Exploring natural dyes for Easter eggs is eco-friendly and adds a unique flourish. Ingredients like beets, spinach, and onion skins can produce verdant hues.
Ingredients
- Hard-boiled eggs
- Food color
- White Vinegar (see notes for options if you don’t have Vinegar)
- Cooking Method: Prevent your display from turning off
Istructions
- Bring a substantial amount of water to a simmer.
- Pour 1/2 cup of scalding water into a canning jar or container that can withstand heat. Then, incorporate one teaspoon of Vinegar and ten to twenty droplets of food coloring. Iterate to produce additional hues. If you are coloring eggs with children, wait until the dyes have cooled before proceeding.
- Soak the eggs for approximately five minutes in the dye. The eggs should be flipped midway through cooking to make sure that both sides are evenly coated.
- Return the colored eggs to their carton and allow them to dry before handling.
Tips
- Suppose you do not have Vinegar; substitute lemon juice or omit it altogether. Eggs colored without Vinegar will produce pastel hues.
- Before dying the eggs, place decals on them to create two-toned designs. Once the eggs have dried, remove the stickers to reveal the plans.
The Science Behind The Perfection Of Easter Egg Dying
You will likely embark on a dubious mission to conceal many hard-boiled eggs throughout your home and hope—oh, hope beyond hope. Before the search, however, you must dye the eggs in a foul mixture of food coloring, water, and Vinegar.
The vinegar component has always irritated me. Why must an acrid odor be added to the dying process when hard-boiled eggs already have a piquant aroma?
It comes out that it’s not just to prevent children from drinking instead of dunking. Most dietary dyes are acid dyes, so named because they only function in acidic environments.
Vinegar, a solution of 5 percent acetic acid in water, is added to lower the pH to a level where the pigment will bind. However, is there an optimal pH for egg-dyeing saturation? Regular food coloring instructions state that you should add one teaspoon of Vinegar per half-cup of water; however, would adjusting the acidity by adding more or less vinegar yield improved results? WIRED decided to investigate.
First, some clarification: Why does acid make dyes more effective? Individually colored molecules are sodium salts of a phenolic acid. Once these compounds are introduced to water, the sodium ions separate from the negatively charged portion of the molecule.
When you add Vinegar, an abundance of free protons — positively charged hydrogen ions — fly in to replace the absent sodium. Hydrogens currently associated with dye molecules are crucial because they facilitate hydrogen bonding.
Their slightly positive charge attracts it (along with the dye) to the somewhat harmful elements in the eggshell’s calcium carbonate and protein molecules (CaCO3).
An egg’s red, yellow, blue, and green hues depend on how each dye molecule absorbs and reflects various wavelengths of light. However, the saturation of the color depends on the strength of the bond between the calcium-rich surface of the egg and the pigment molecules. Hence, you must add Vinegar. However, how much?
01 Egg-Dye
We monitored the pH of a hard-boiled egg while testing the effects of various concentrations of white Vinegar with 5 percent acetic acid on its color. We examined six distinct conditions: Pure water (pH 7), a cup of water containing 1/8 tsp of Vinegar (pH 6), a cup of water containing 1/2 teaspoon of Vinegar (pH 5), a cup of water containing 2 teaspoons of Vinegar (pH 4), 50/50 vinegar and water (pH 3), and pure Vinegar.
The alkalinity of your water will have a minute effect on the pH of these mixtures but not enough to be noticeable in the appearance of your eggs or on a pH test strip.
We cooked all the eggs at the same time and added the same quantity of food coloring to each cup (six drops) while accounting for the volume of each cup. Following a precisely timed 5-minute dunk for each egg, we observed the following:
Pure water was a disaster. As you might have anticipated, a pH of 7 is not sufficiently acidic to activate the acid dye. We can attribute a small amount of color to a low level of hydrogen bonding and a small amount of ionic bonding that may be occurring.
The situation then becomes more engaging. You could color the eggs effectively with Vinegar alone, but this presented a different problem. There was so much bubbling on the egg’s surface when we put it into the Vinegar that it left spots on the egg’s shell where the dye could not adhere — an entirely new type of chicken pox.
These droplets emanating from the egg’s surface are carbon dioxide (CO2), produced when the free protons in the acetic acid react with the CaCO3 on the egg’s shell. They also generated a streaky appearance, likely caused by the bubbles rolling up the egg’s sides.
Thus, our intermediate conditions remain. Ultimately, these boxed instructions are pretty excellent. One teaspoon of Vinegar per half-cup of water yields a pH of approximately 4, consistently producing a uniformly clear color. The color produced by the mixture of half water and half Vinegar, which had a slightly lower pH, was somewhat more saturated.
More protons result in increased hydrogen bonding and color attachment. However, this additional acid still caused a small amount of the bubbly spots that afflicted the vinegar-only dye solution. If the egg’s pH is higher than 4, pieces of white will protrude through the egg.
Easter egg dye is essential to the vibrant and joyous tradition of dying Easter eggs. Its primary components, food coloring, water, and Vinegar, combine to produce a rainbow of hues for your Easter eggs. There are countless methods to infuse creativity and color into your Easter celebrations, ranging from ancient origins to modern commercial kits and natural do-it-yourself recipes.
Thank you for reading…..