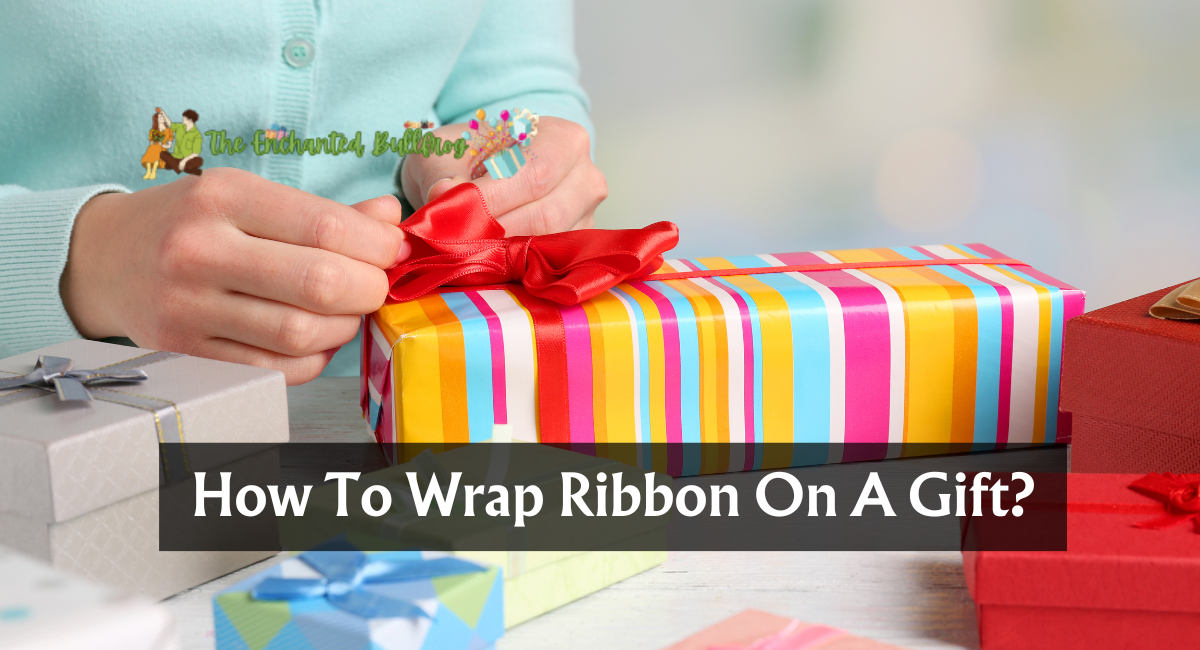
You have your present wrapped and ready to go. Only a bow is needed, and covering a ribbon bow around the box will give it a more elegant look than a stick-on bow. We will demonstrate how to tie a bare ribbon bow, a diagonal bow, and a fancy woven appearance for your gift box!
How To Wrap Ribbon On A Gift?
Here are three ways to wrap ribbon on a gift:
Method: 1
Tying a Basic Bow
- Drape the ribbon across the top of the package horizontally. Leave approximately 4 to 8 inches (10.16 to 20.32 centimeters) for the bow’s tail. Wait to remove the ribbon.
- It is preferable to leave more ribbon dangling than too little. You can always trim it down in the future.
- Pull the remaining ribbon under the box and to the front. If you flip the box over, you may forfeit your position. Instead, raise the box while bringing the remaining ribbon behind it. Place the container back on the ground once the ribbon has exited the opposite side.
- It would help if you crossed the ribbons across the front of the carton. Bring the ribbon’s longer end to the box’s midsection, followed by the shorter end. Vertically orient the stripes by twirling them around each other.
- If your ribbon has a correct and incorrect side, you may need to coil it twice to conceal the wrong side.
- Wrap the ribbon around the box’s rear and around to the front. Raise the compartment once more. It would help if you pulled the lengthier portion of the ribbon behind the box and out on the opposite side. Place the carton back down.
- Secure the twisted portion with your forefinger while wrapping the ribbon around the back.
- Compare the ribbon to the first portion and cut it to size. Return your ribbon to the center of the box. Measure it against the beginning end of the ribbon and miss it.
- Wind the ribbon beneath the contorted section. Pull the ribbon diagonally across the front of the twisted portion. Bring it under the deformed area and out the way you came in. To tighten the ribbon tie, pull on both ends.
- Tie a loop with the ribbon. Both ends of the ribbon are folded into rings. The middle circle is created by crossing the left over the right loop. Pull the left loop through the smaller loop, then tighten by pulling the left loop.
- Trim the extra ribbon after adjusting the bow. Spend a moment adjusting the loops and tails. Using a wired ribbon, you can also soften the curls. Cut the bottom ends into angles or Vs for a more elegant flourish.
Method: 2
Tying Ribbon Diagonally
- Drape the ribbon across the box’s upper left corner. Leave approximately 4 to 8 inches (10.16 to 20.32 centimeters) of the left corner dangling. Keep the remainder of the ribbon on the spool on the top edge.
- Wrap the ribbon around the upper-right corner. Pull the ribbon’s spool-side behind the top right corner and down toward the bottom right corner.
- Keep your forefinger on the ribbon in the upper left corner to prevent it from falling off.
- you should wrap the ribbon across the bottom right corner and under the bottom left corner. Maintain a snug fit on the wraps so they do not slide off the extremities.
- Return the ribbon to the upper left corner. At this point, it would be prudent to modify the positions of the stripes on each corner. Pull them away from the edges if they appear to be sliding off.
- Remove any excess ribbon. Bring both ribbons towards the upper left corner’s center. Compare the spool ribbon to the other ribbon and cut it to the same length.
- Cross and bind the ribbons together. Cross the left stripe over and under the right ribbon, then pull both ends to tighten. Fold both ribbons into loops, then cross the right one over the left—similar to fastening a shoelace!
- Remove the excess ribbon to complete the bow. Once the bow is taut and secure, snip the tails of the extra ribbon. Trim them at an angle or with notches to add a touch of elegance.
Method: 3
Creating a Woven Look
1. Cut four ribbon lengths to fit the length of the box. You will need four pieces of ribbon long enough to drape around the tube lengthwise, plus 2 inches (5.08 centimeters).
- Consider using two pieces of narrow ribbon and two slightly wider stripes to achieve a distinctive appearance. Alternatively, you can use two contrasting colors.
- The use of thick and woven ribbons is not recommended. For optimal results, use satin or balloon ribbon.
2. Cut four ribbon strips to the width of the box. Utilize the same ribbon as in step one. This time, cut the ribbon so it is long enough to encircle around the box’s width plus 2 inches (5.08 centimeters).
3. Place the first set of ribbons next to one another on the table. Take the four lengthy stripes and place them on the table. Ensure they are parallel and separated by no more than 14 inches (0.64 centimeters).
- Alternate the widths and colors if you use separate sizes.
4. Place the gift with its face down on the ribbons. The compartment may be centered or off-center, depending on where you want the stripes to be.
5. Secure the ribbons with double-sided tape after wrapping them around the box. Wrap and tape each ribbon individually; do not attach them simultaneously. Pull the ribbons tightly around the box until they are secure. The ends of the ribbon will overlap by approximately 1 inch (2.54 centimeters).
- Ensure you only tap the top ribbon to the lower ribbon; do not tape the stripes directly to the box.
- You can use adhesive dots as an alternative to double-sided tape.
6. Attach the second set of ribbons directly above the first pair. Apply a strip of double-sided tape to each end of your short stripes. Make sure that the extremities of the ribbons are perpendicular to the first long ribbon as you arrange them directly above it.
- Again, separate the ribbons by no more than 14 inches (0.64 centimeters).
7. Invert the box and weave the shorter ribbons through the first set of stripes. Bring your short ribbons around to the box’s front. Weave the initial ribbon over and under the initial stage of ribbons. Weave the next ribbon under and over, and so on. Continue weaving until all four strands have been incorporated.
8. Attach the ribbons to the rear of the package. Turn the box over once more. Attach a strip of double-sided tape to the end of each ribbon, then press each ribbon to the rear of the pack individually. Ensure the extremities of the stripes are aligned.
- As with the front, weave the short ribbons through the long ribbons on the rear to add a decorative touch.
9. If desired, add a decoration to the front. The ribbons are incorporated into the design. If you feel your gift is missing something, you can purchase or create a matching bow and attach it to the box. Instead of concealing your labor, position the bow to the side so the weaving remains visible.
- Under the ribbon, try adding a tag, pom-pom, tassel, or even a beautiful piece of foliage.
The addition of ribbon to a present is a simple yet elegant detail. Start by securing the ribbon at the bottom with tape, then wrap it diagonally around the gift for a decorative effect. Finish your considerate gift with a bow or knot to ensure a polished and visually appealing presentation.
Thank you for reading…..